Before and After a Chemical Peel: What to Expect + Photos
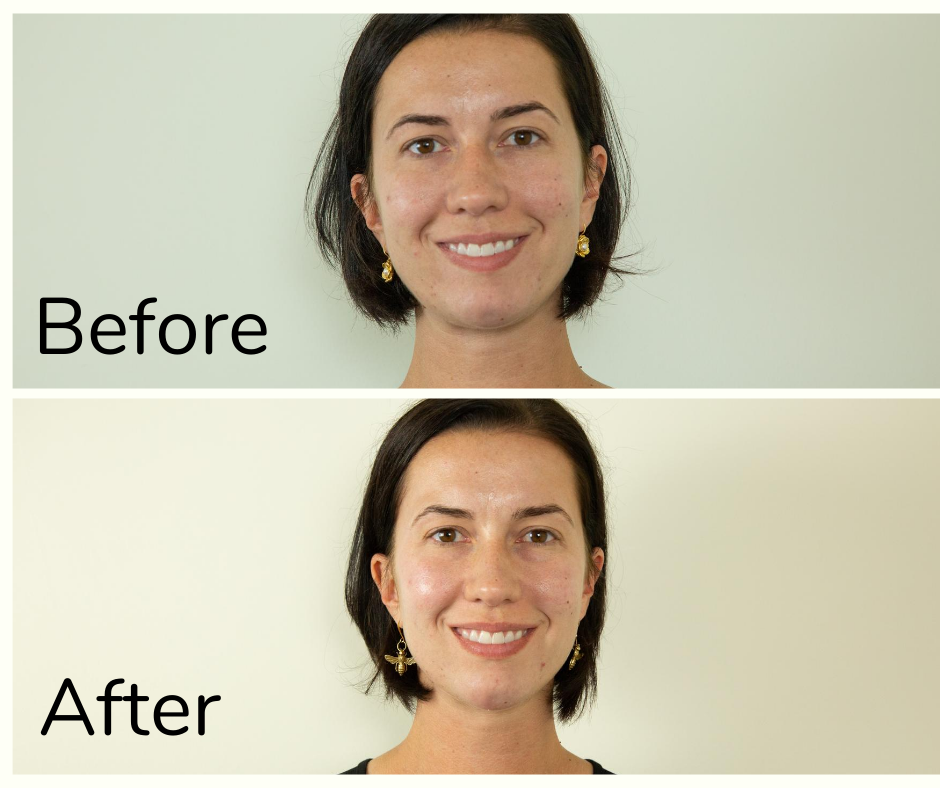
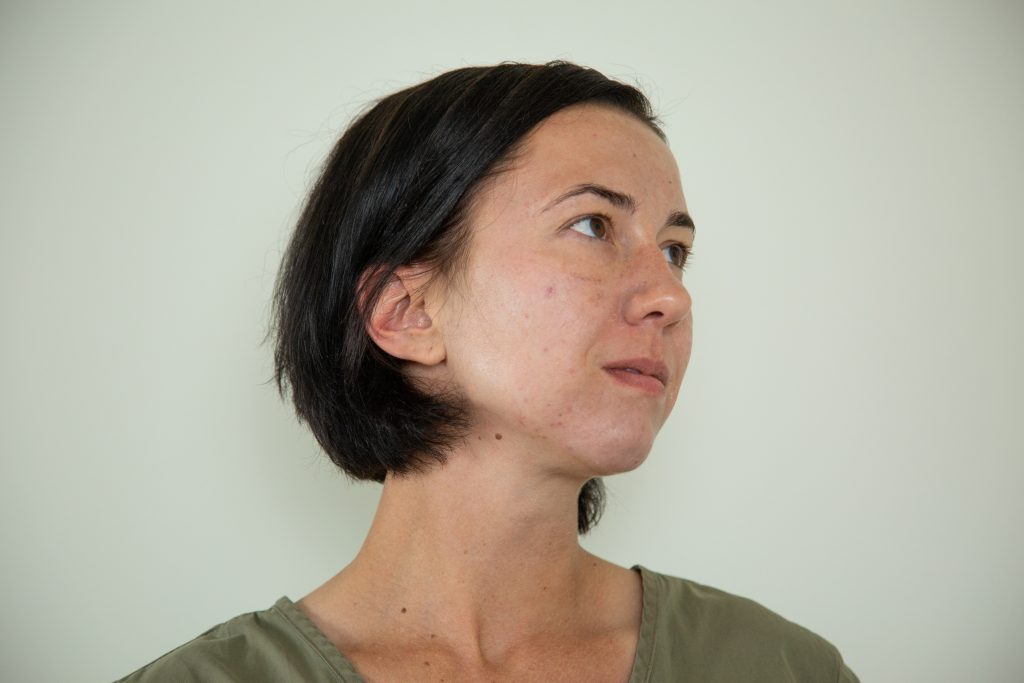
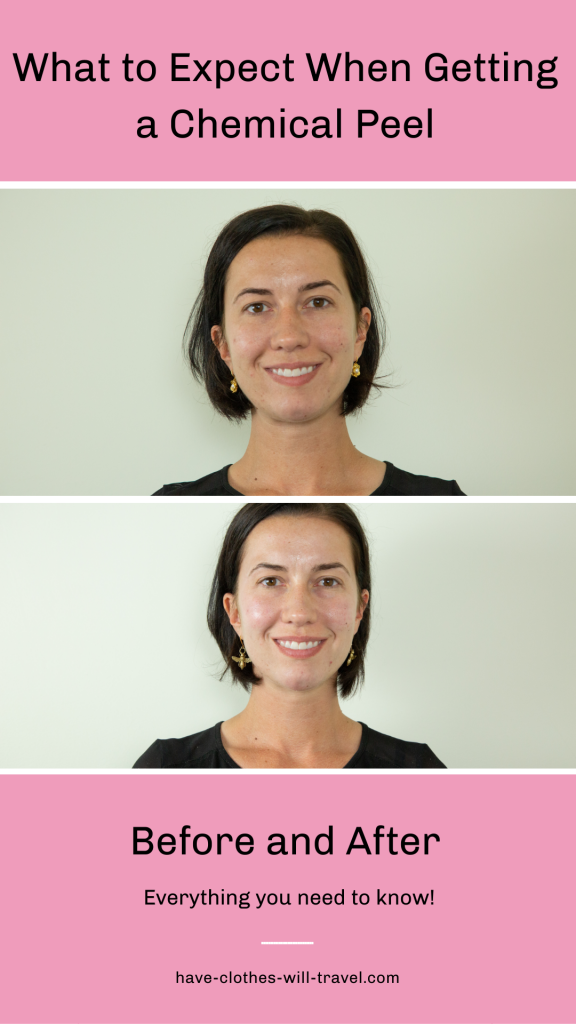
Are you interested in getting a chemical peel but aren’t sure what to expect? This post is sharing everything you need to know before and after a chemical peel…plus photos of my face throughout the peeling process. (All of these photos are taken without makeup – to give you the best idea of what my skin looks like.) WARNING: some of these peeling photos are rather nasty.
What is a Chemical Peel?
A chemical peel is when a chemical solution is applied to your skin that causes it to exfoliate and eventually peel off. The new, regenerated skin is usually smoother and far healthier looking than the old skin. It’s used to help treat acne, hyperpigmentation, fine lines and wrinkles, etc.
It’s worth noting that many aestheticians recommend you get more than one chemical peel to achieve optimal results. Some places will sell them in sets of 3 for this reason. (This is what I used to do.) The condition my skin is currently in, it was recommended I receive 2 within a 1-month time span (which I did.)
Before I jump into the whole chemical peel process, I want to briefly explain my background with chemical peels, and the issues I have had with my skin over the years. If you would rather just learn about the chemical peel, scroll to the “what to expect when getting a chemical peel” section.
Why I Started Getting Chemical Peels & Why I Stopped
I used to get chemical peels on a fairly regular basis 7+ years ago. My skin at this time was in rough shape. I was dealing with cystic acne, hyperpigmentation, blackheads and whiteheads. I was doing everything I could to try to stop the acne I had.
Chemical peels were helping my skin the most out of anything I had tried previously. The amount of acne on my face was decreasing as was my scarring.
Eventually, I stopped doing chemical peels because it was getting too expensive to continue getting them at the frequency I needed to maintain my problematic skin. Plus, I absolutely HATED the downtime that came after a chemical peel. My skin would look absolutely terrifying for a week after I had one. (And I was working with elementary school kids at the time, who have millions of questions about why my face looked weird for a few days, haha.)
I then went to my dermatologist for help. He prescribed taking a combination of doxycycline (oral antibiotic) and clindamycin (a topical cream). He also helped me figure out some foods that were triggering breakouts (it’s mainly junk foods, especially refined sugars). I modified my diet and used these prescriptions for over a year before my acne subsided.

Why I’m Getting Chemical Peels Again
My skin is a thousand times healthier now than it was over 7 years ago, but it’s far from perfect. I do still get hormonal breakouts, tons of blackheads and also milia. I also have a little leftover acne scarring.
Now seemed like the best time ever to get a chemical peel again! This is because I’m hardly leaving my house and when I do, more than half my face is covered in a mask. So, if I’m going to deal with the downtime that comes with a chemical peel – this is is the perfect time to do it!
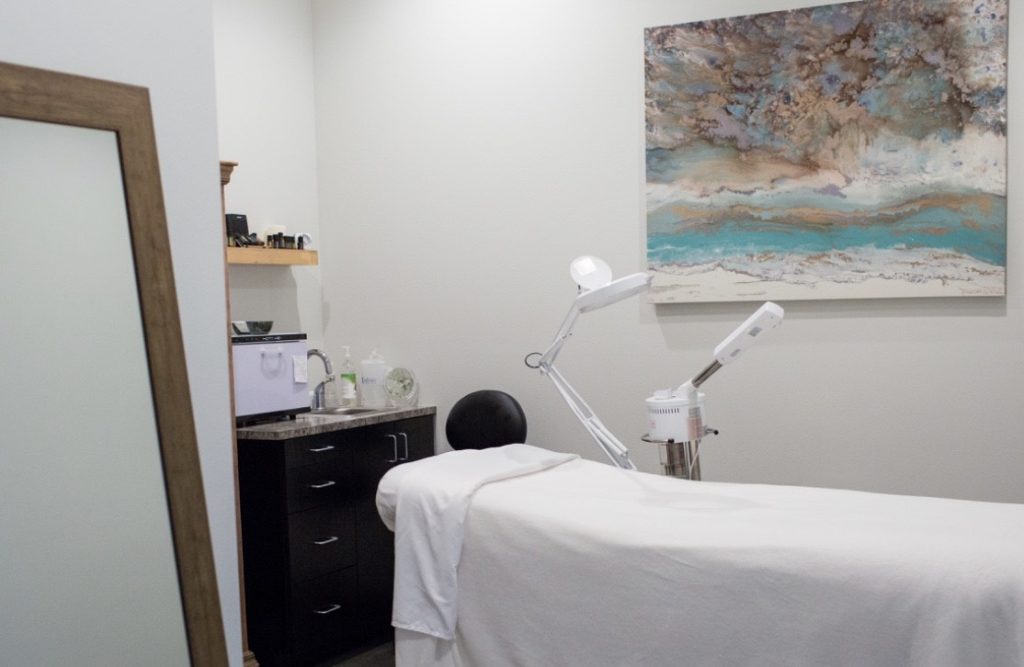
I scheduled my chemical peels at the salon I have been going to since I moved back home last fall – Ahava Salon & Spa in Appleton, Wisconsin. I’ve been going to them for all my hair and beauty treatments for the last year. (They do a great job!) I did their PCA chemical peels.
What to Expect When Getting a Chemical Peel
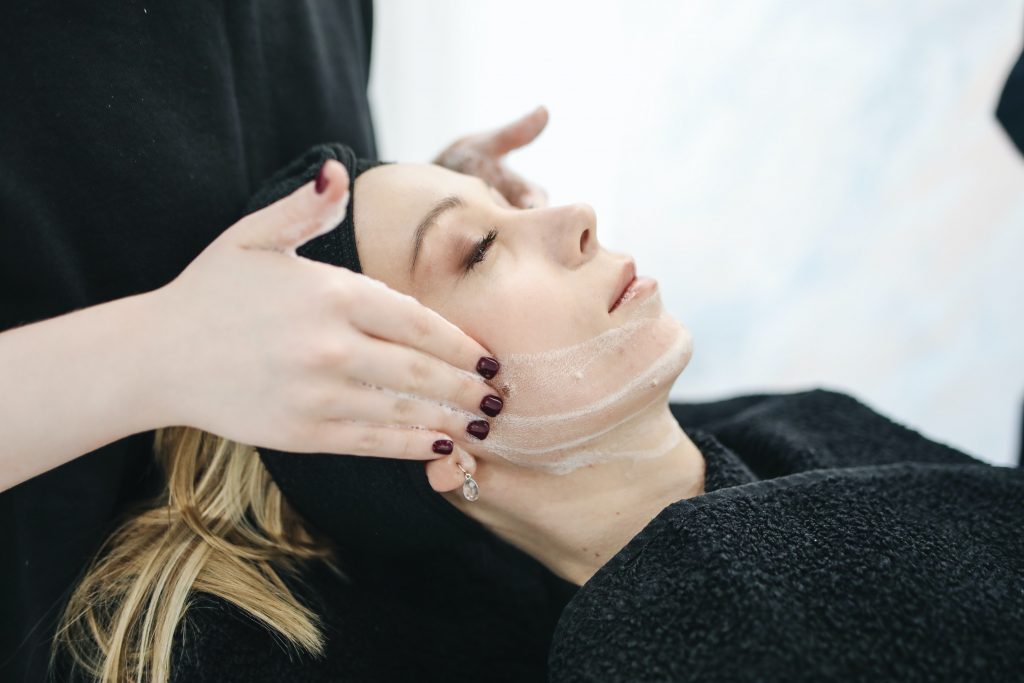
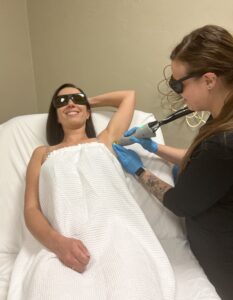
The peel itself isn’t all that bad and takes less than an hour to complete, typically. You’ll discuss your skin conditions with your aesthetician, fill out some forms and then get comfortable.
Your aesthetician will cleanse your face and then apply the first layer of the treatment and allow it to sit. They’ll ask you if you’re feeling any pain. (I only felt a slight tingling at this stage.)
Then, they will likely apply one more layer. This will likely feel more tingly than the previous application.
Depending on how your skin is feeling and reacting, they may apply one more layer. (I have never had more than 3 layers of treatment applied at one time, as my skin gets quite irritated by the third application.)
Then, some moisturizer and sunscreen will be applied.
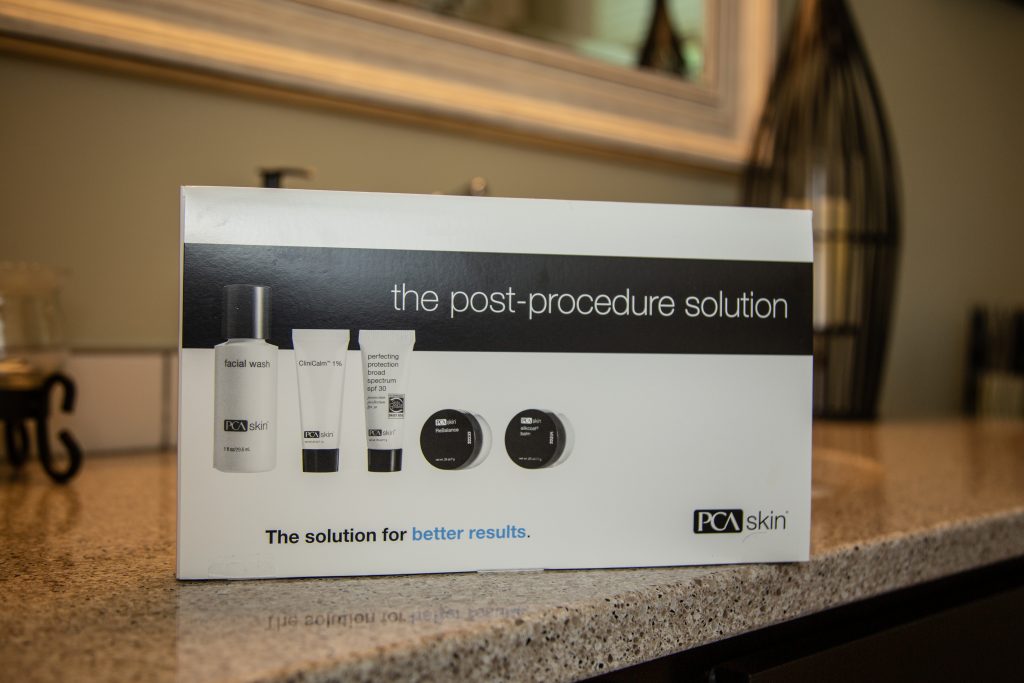
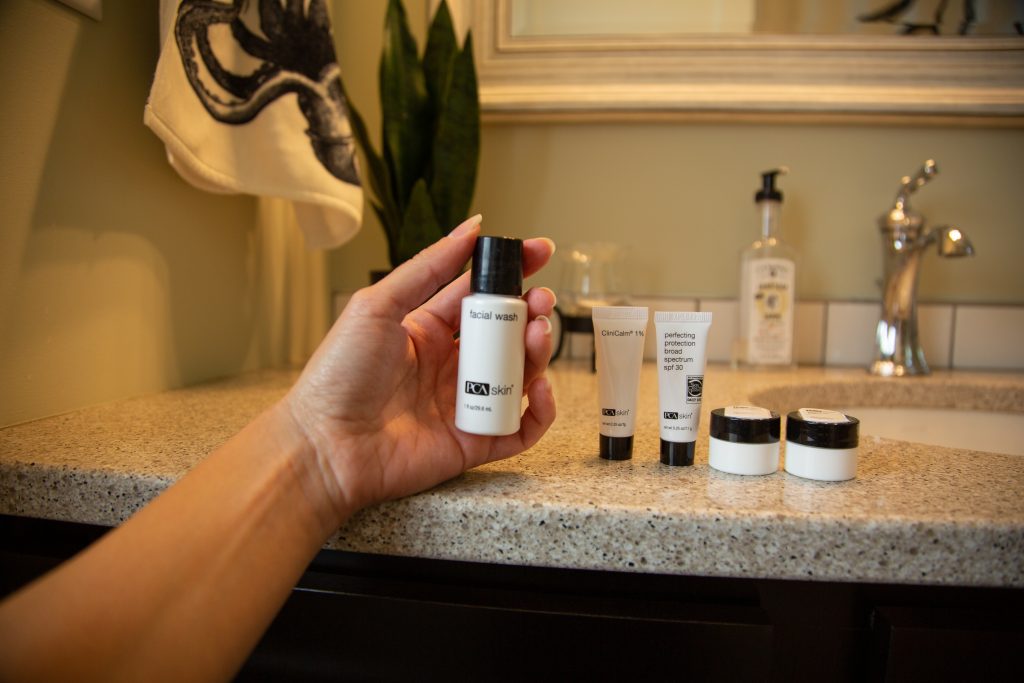
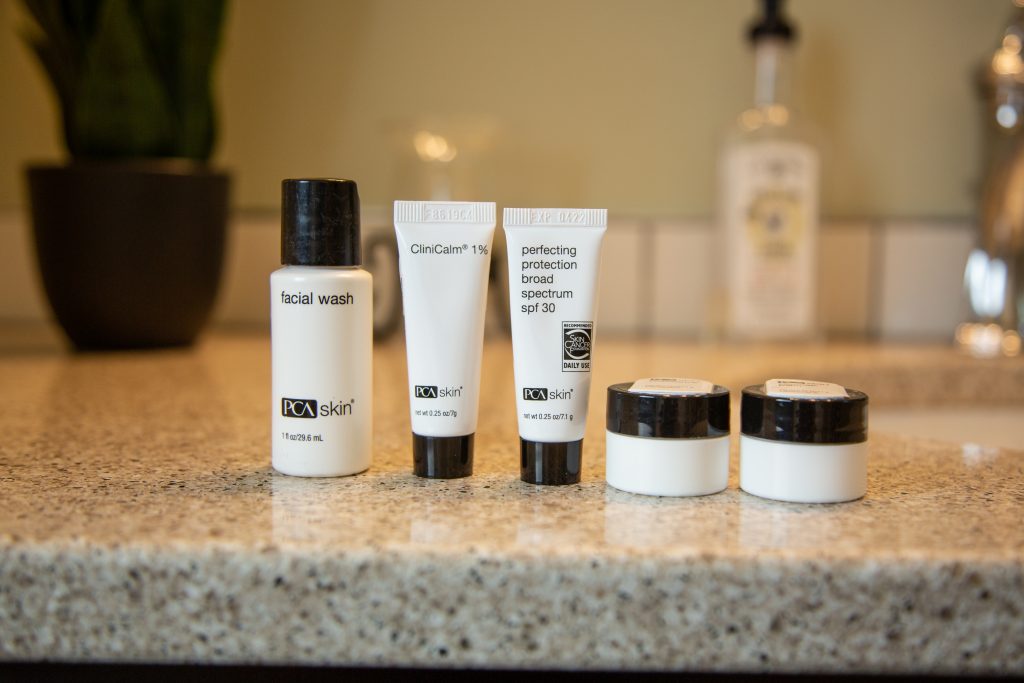
My aesthetician recommended purchasing the Post-Procedure Solution Kit by PCA Skin to use for my at-home treatment. I am REALLY happy she suggested this. The kit did a great job of helping my skin heal quicker. It also helped with some of the discomfort of having dry/peeling/itchy skin for a few days (more on that in a second).
Plus, I could reapply the creams throughout the day when my skin started to feel dry & tight, and it never got too oily or icky looking. (I remember in the past I would apply my normal moisturizer throughout the day and my skin would be an oily disaster by the end of the day.)
- Click here for more info on this post-chemical peel kit. These are not full-sized bottles, FYI.
I used this PCA kit + as well as my Hyaluronic Acid Booster throughout the 7-day recovery period. (My aesthetician said it was OK to keep using this, as it will provide additional hydration – I absolutely love this stuff.)
The Actual “Peeling” Process + Photos
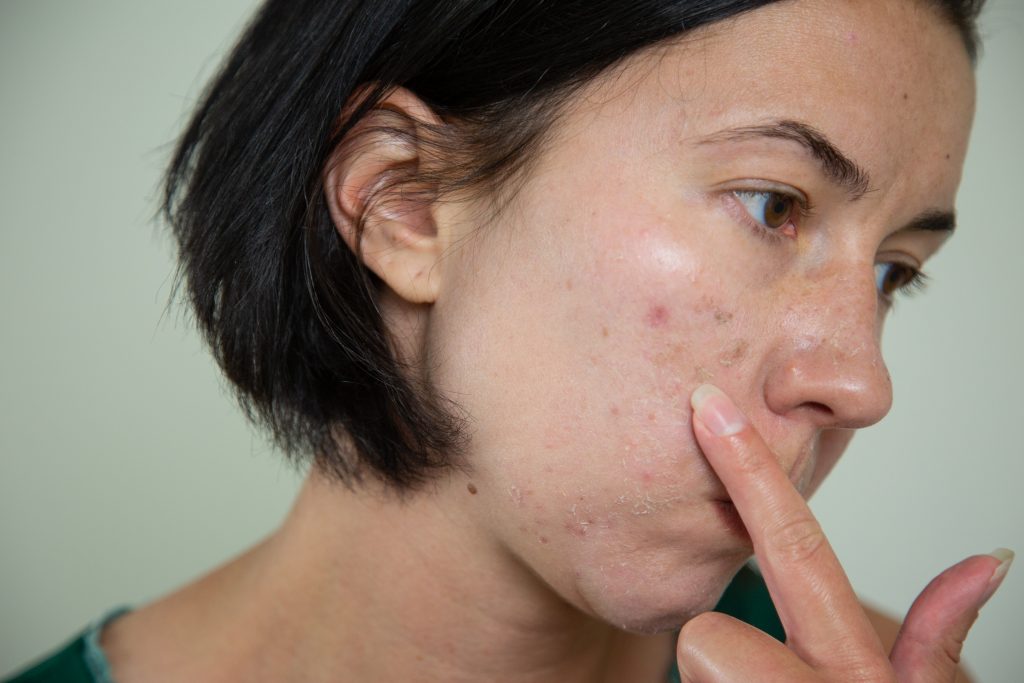
I’m sure what everyone is most concerned about, though, is just how much your skin is going to peel after this treatment. Bad news, folks… it’s likely going peel A LOT. For me, it usually takes until day 3 before my skin gets scary looking. The whole process takes about 7 days.
Day 1: Immediately After the Chemical Peel
My husband described this as the day it looked like I scrubbed my face raw, haha. My skin was a bit shiny and looked like I had indeed scrubbed it too hard, as my cheeks were raw and rosy looking. My skin felt a little tight, but nothing too terrible.
Day 2: The First Full Day After My Chemical Peel
I’m not experiencing any peeling on day 2. My skin feels a little tight and dry (sort of like a mild sunburn).
Day 3: The Peeling Begins!
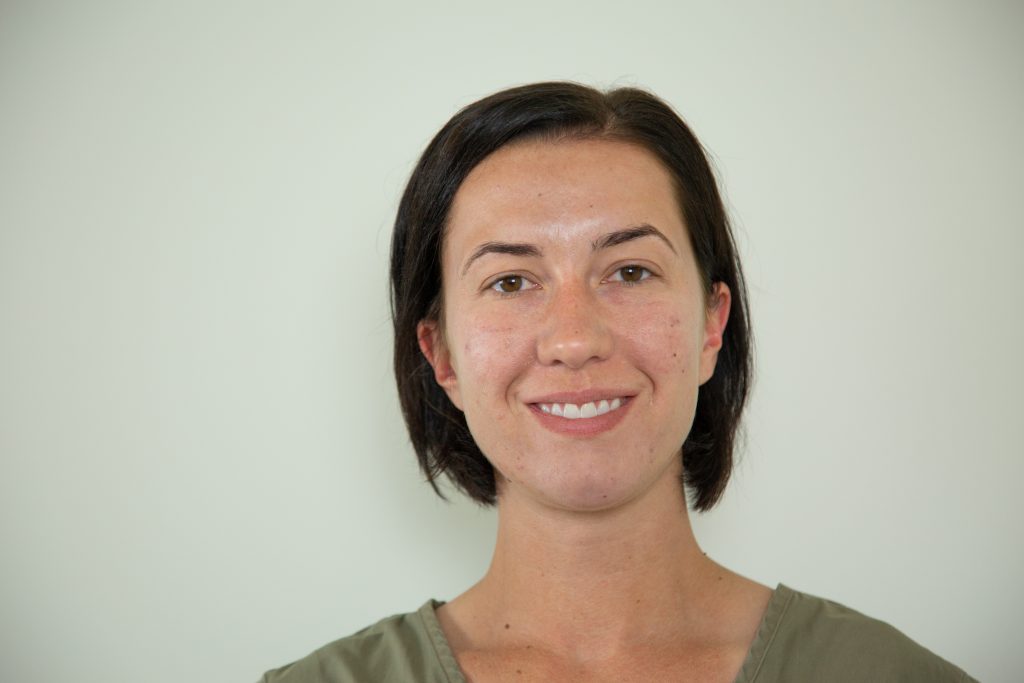
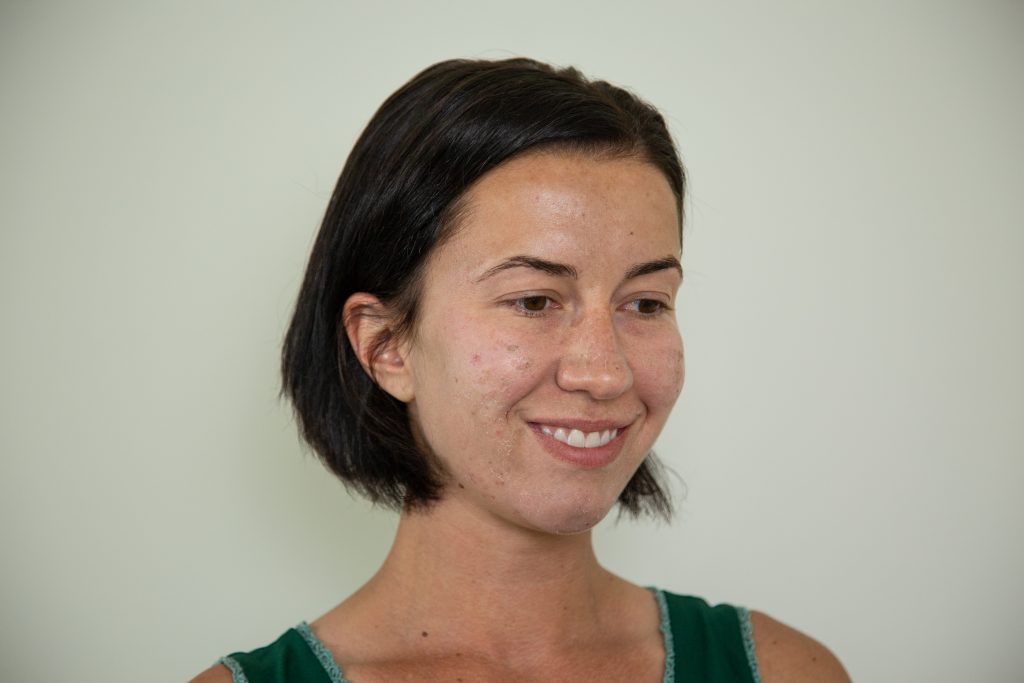
I’m beginning to notice some patches of skin that are peeling. My skin is dry and itchy and looks a little weird when I put makeup on. (The lines under my eyes are actually my skin starting to dry and flake – it looks really weird!)
Day 4: The Worst Day of Peeling
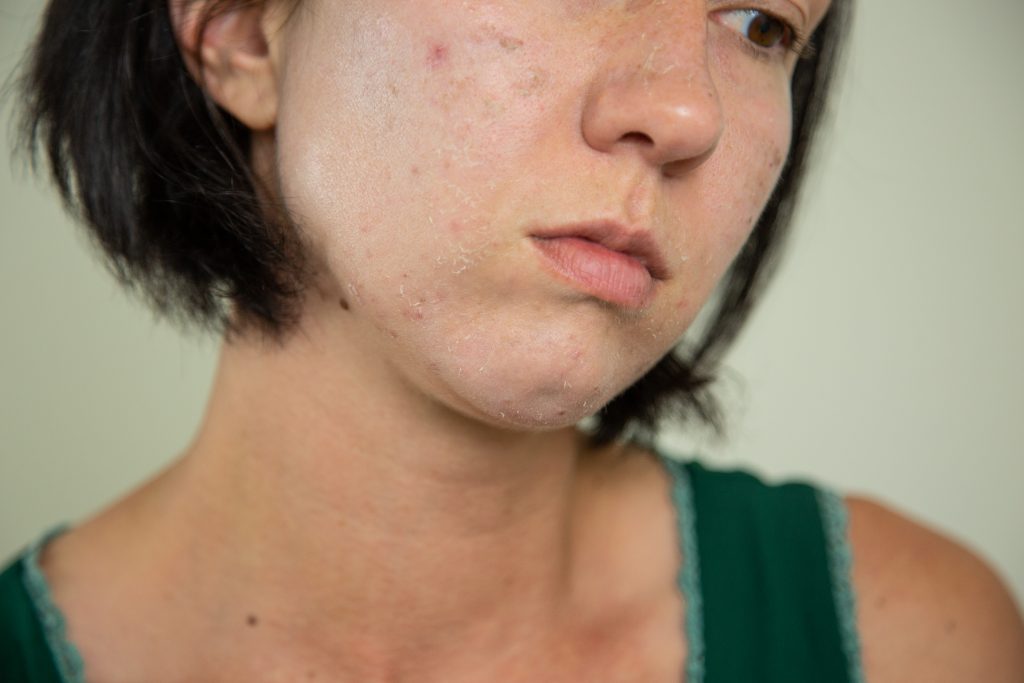
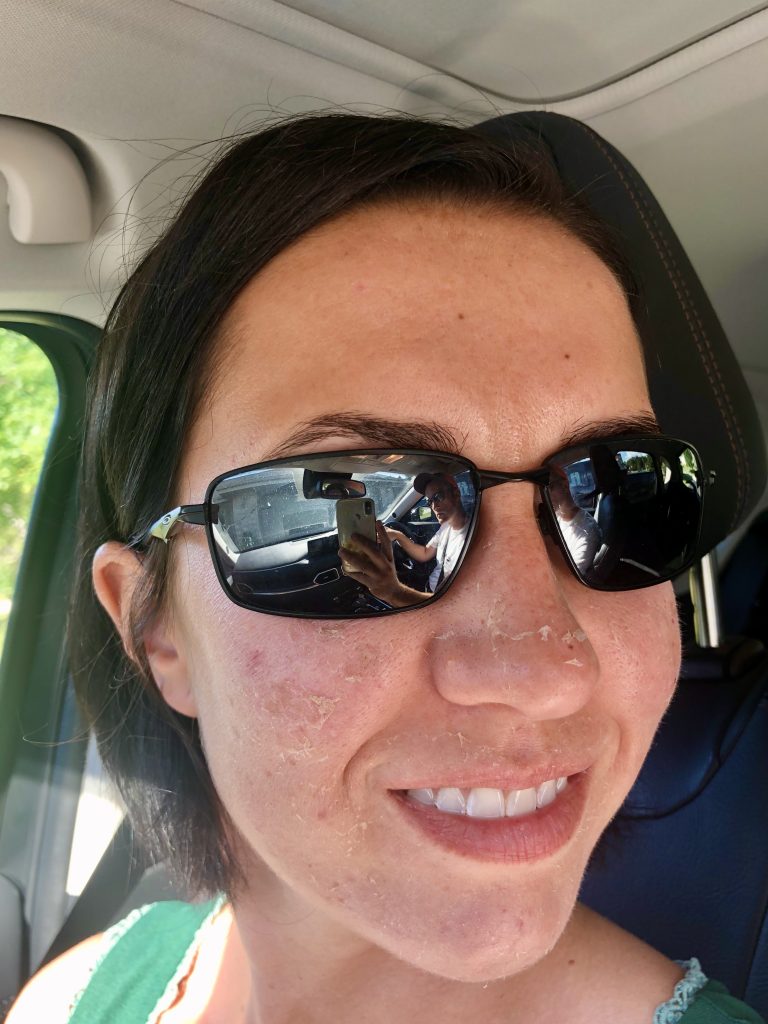
This is my least favorite day of the whole process. My skin looks terrifying! It’s peeling like crazy and very dry/itchy feeling. Blech! The photo below is one my husband snapped in the car later that day, it looked so much worse than the photos above, so I wanted to share it as well to prepare you for the level of peeling you may experience!
Fortunately, my skin only looked this terrifying for one day!
Day 5 & 6: Peeling Begins to Taper Off
Different sections of my face are peeling slightly and feel a little itchy (identical to day 3’s photos).
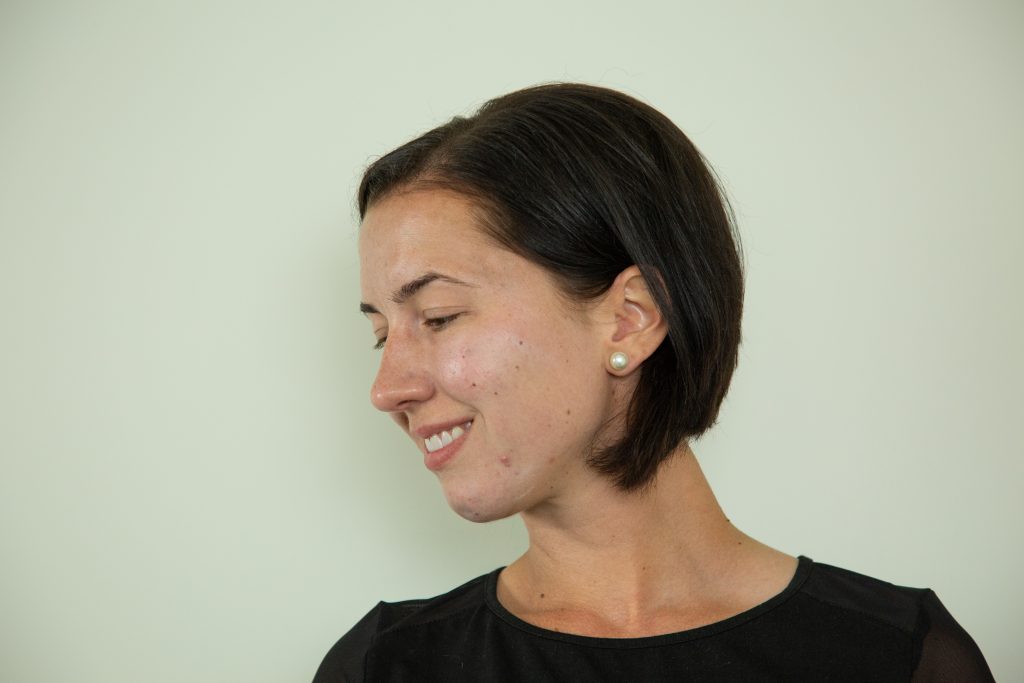
Day 7: No More Peeling & Brighter Skin!
My skin looks a lot brighter and clearer! It’s not absolutely “perfect” by any means, though. I also developed a new zit on my chin after the treatment (which is not uncommon to happen).
I am happy with how much brighter and clearer my skin looks!
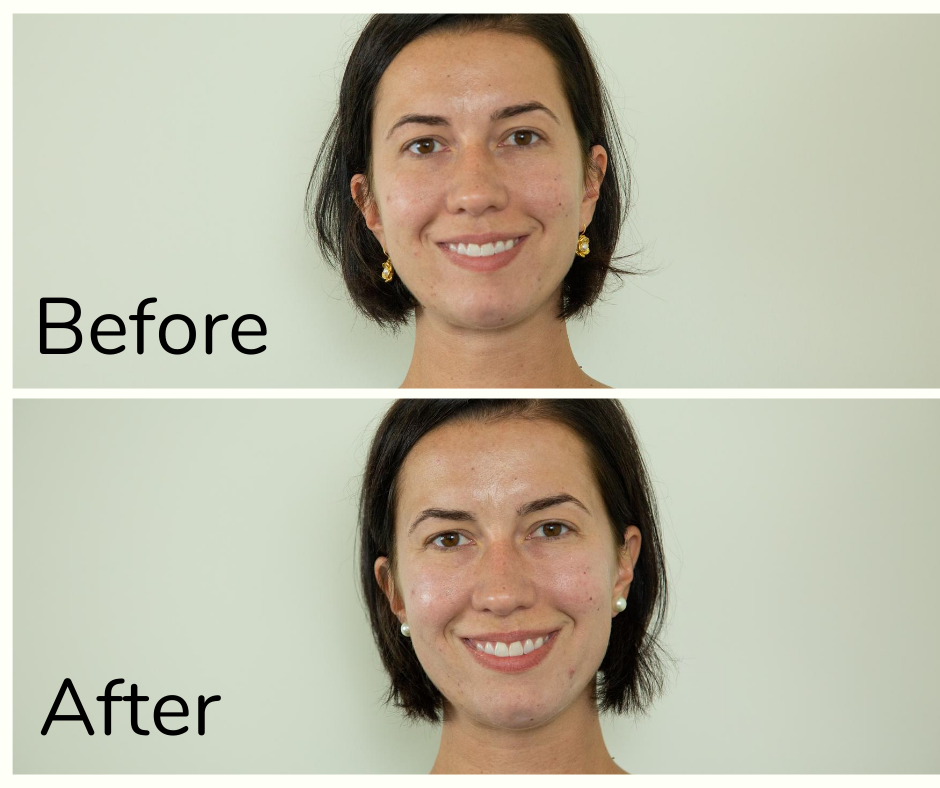
Chemical Peel Round 2
As I mentioned earlier in this post, chemical peels are best done more than once. You’ll see results after getting just one, don’t get me wrong, but for most skin issues, one time isn’t going to cut it.
My aesthetician recommended I come back within 2 weeks for one more chemical peel. This time, my aesthetician was able to perform more extractions (which is where they dig out all the lovely zits, blackheads and milia on my face). This is because all the debris and dead skin on my face was nice and loosened up after that chemical peel.
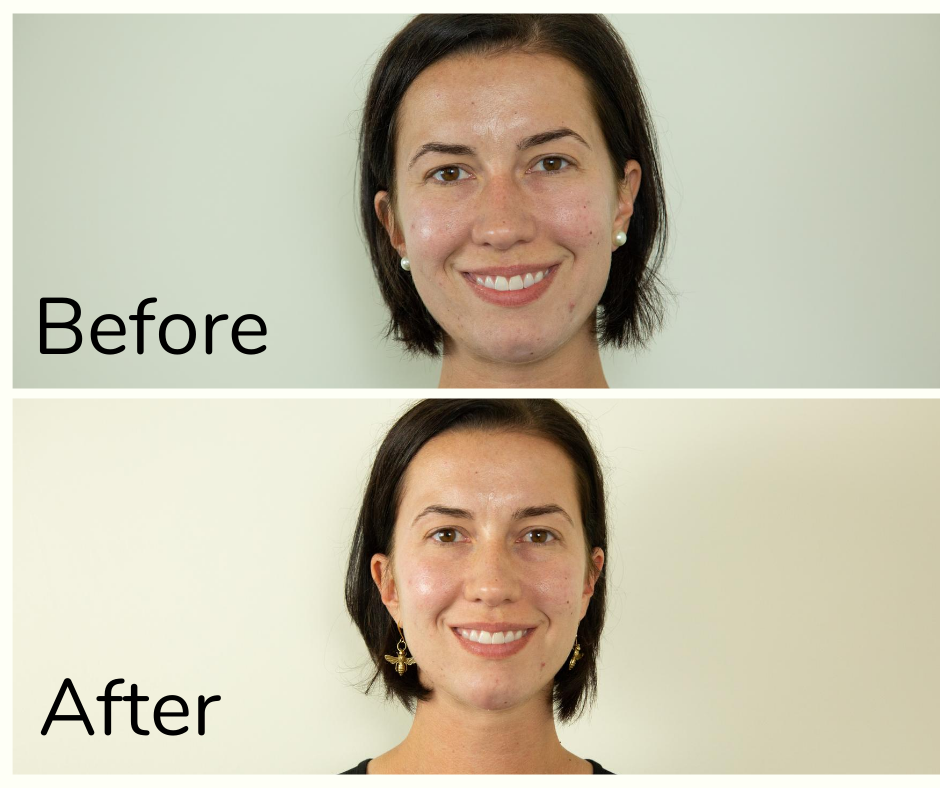
Otherwise, the process was identical. I was hoping my skin would peel less during the week, but it still peeled like crazy on round 2! However, I like how much smoother my skin is – far fewer milia and blackheads. (So, it was worth it for me.)
Final Thoughts on Chemical Peels
In my experience, chemical peels are not a “silver bullet.” Meaning, they didn’t cure all of the many issues I have with my skin. This only happened when I was put on medications by my dermatologist.
However, they are fantastic for brightening skin and for correcting some minor skin conditions. I am really happy with my current results! (Shoutout to Ahava Salon and Spa for doing an amazing job!)
I still don’t love the recovery time associated with chemical peels, but the results are worth it. They’re far more noticeable, in my experience than getting a facial.
Products I Use on a Daily Basis
After I use the PCA Kit for 7 days, I switch back to using a combination of skincare products to deal with my combination and acne-prone skin.
The skincare products I use on a regular basis:
-
- Nature in a Jar Cleanser (Cleanses, but is gentle!)
- Hydra3 Eye Cream (BEST eye cream ever. Gets rid of fine lines and puffiness after just a couple of uses.)
- Hyaluronic Acid Boosting Serum (Immediately hydrates, plumps and smoothes my skin – LOVE this stuff. You don’t need much either.)
- Nature in a Jar Moisturizer (Great for my combo skin! Keeps it hydrated without being greasy.)
- Maelove Sun Protector SPF 30 (BEST sunscreen ever + doubles as a makeup primer.)
- Intensive Brightening Treatment (I use this a few times a week at night to help with my hyperpigmentation.)
- Facial Scrub (Typically only use this once or twice a week now to exfoliate.)
- Prime Renewing Pack (I use this once a week to instantly brighten and clear my skin. This is my secret weapon to get perfect-looking skin in just a few minutes! It’s seriously magic!)
I am also happy to answer any questions you might have about getting a chemical peel or my skin in the comments section at the end of the post!
-
-
- Read next: Honest Valmont Skincare Review + The Best Valmont Products to Use
- Read next: Honest TYME Iron Pro Review for Fine, Short Hair (With Photos)
- Read next: How to Have a Relaxing DIY Spa Day at Home
- Read next: My Honest Experience with Novalash Eyelash Extensions
- Read next: Lipstick Experiment: What’s the Longest Lasting Liquid Lipstick?
- Read next: My Experience with Celebrity Eyebrow Artist Sharon-Lee
-
If you liked it – Pin it!
*Disclosure: some of these links are affiliate links. Meaning, if you click a link and make a purchase, Have Clothes, Will Travel gets a very small commission at no extra cost to you. Thank you for supporting the brands that make this blog possible! I am also a participant in the Amazon Services LLC Associates Program, an affiliate advertising program designed to provide a means for us to earn fees by linking to Amazon.com and affiliated sites.











Hi Lindsay I’m glad it worked well for you. your skin is glowing 🙂 thank’s for sharing your experience!
Hi! You look amazing, literally glowing.
Can I ask the name of the peel? Many thanks. Sara
Aw, thank you! The name of the peel I did is called “The PCA Skin Express Peel.”
Can we just purchase the products and do the peel at home?
There are at-home kits available. It’s my understanding that aestheticians are able to administer stronger peels, though, than what we could buy at a store. PCA does have an at-home peel kit, if you’re interested in trying one.
The before-after pictures are stunning! You can definitely see a difference 🙂
Flor
Oh wow, you’re glowing. This worked great. I have never tried one, but want to now.
It’s so great you share this Lindsey. I absolutely LOVE AnnMarie skincare because it’s so natural. I bet that makes a huge difference too. It’s crazy how many chemicals we put on our skin trying to fix it….
XOOX
Jodie