How to Start a Blog: A Step-by-Step Guide by a Full-Time Blogger
I have sort of been working my way backwards to this post. I began by sharing how I make money as a blogger and my favorite tools I use to run and manage my blog. Now, it is time to share the nuts and bolts – how to start a blog!
My blogging journey began back in 2014 when blogging was still a relatively “new” concept. I hadn’t started this blog thinking that it would one day be my career. It started as a creative outlet where I shared photos of our travels and outfits I styled. It has now grown into my full-time job that I couldn’t be more proud of!
This guide will help you get started with launching your blog on WordPress – whether you want to do it as a hobby or one day grow it into your main source of income! I’m also happy to answer questions in the comments section at the end of the post.

Please note: this post is for WordPress blogs that are self-hosted. I do not recommend using BlogSpot, Wix, Squarespace, etc. These platforms do not give you the same amount of control over your website that WordPress does. WordPress gives you complete control over your website! WordPress can be a little more complicated up front, but it’s 100% worth it – especially if you hope to one day make money from your blog!
10 Steps to Starting a Blog
1.) Figure Out Your Niche.
What do You Want to Write About? Who is Your Audience?
The first step to setting up a blog is having an idea of what you want to write about. What are you most passionate about? What topic will you never get sick of writing and learning about?
For me, I write about two different topics that I’m passionate about – travel and style. I create detailed guides about the countries I have lived in and also reviews and tips about other places I have visited. I also share product reviews, shopping tips, packing lists, and outfit ideas on my blog. Plus, I’ve recently started sprinkling in some blogging tips posts.
However, it is worth noting, that the blogging industry is much more saturated and the competition is far greater now than when I started back in 2014. If you are hoping to make a living from your blog, it is better to pick a more defined niche than just “style and travel.” The competition for these topics is pretty fierce these days!
For example, maybe you know everything there is to know about hiking and outdoor activities in Upper Michigan and could share your knowledge… or you make the best DIY paint projects for your country home and could post tutorials…or you’re a 6-foot-tall fashionista who could share helpful tips for other tall ladies on how to dress and where to shop for the perfect outfits. These ideas are more defined than just “travel,” “DIY,” or “fashion” blogger. Narrowing your niches down can be a great way to get ahead of your competition.
Next, determine who you are writing this blog for. Who are the people you are hoping will read your blog?
For example, my writing is aimed at adventurous women between the ages of 25-34, who love traveling to new destinations and trying timeless yet unique styles of clothing. Now, that doesn’t mean I don’t want men, younger/older women, etc. to read my blog, it just means that when writing new content, I’m keeping my audience in mind… and not writing posts or using terms only a 16-year-old boy might be familiar with.

2.) Name Your Blog
This can be the most fun and the most nerve-racking part of the whole process! You want to pick a blog name that will reflect your niche and ultimately become your brand.
I started this process by coming up with words that described both of the topics I was going to be writing about, then tried to figure out how I could combine them and have it still make sense. I made lists and rattled them off to my family and friends for feedback for what felt like forever. It took me nearly a month before I finally settled on “Have Clothes, Will Travel.”
Tips for picking a name:
- I can’t stress this enough – pick a name you know will be able to grow with you. Don’t pigeonhole yourself with a blog name that you may outgrow. Ask yourself if this name will still be relevant 5 or 10 years from now? (For example, if you start a blog titled “Traveling With Toddlers” will you be able to continue the blog after your children have grown beyond toddlers? And same with naming a blog after your hair color – will your hair color ever change?) Changing your blog name should be an absolute last resort, once you are established.
- Make sure this name can be used across all social media accounts. If another blogger or company already has this name on social media, you may want to rethink it. Consistency is very important across your blog and social accounts.
- Keep it simple. Less is more when it comes to blog names. I would aim for 3 words or less. (Do as I say not as I do… people complain to me all the time about how my blog name is too long!)
If this all sounds terrifying and is ultimately keeping you from getting started on your blog, another option is to just go with your own name! YOU are your own brand after all.
3.) Find a WordPress Theme You Like
If you decide to go with a free WordPress theme, then skip this step.
Search the web for bloggers in your niche and see the types of themes they are using. Make a list of what you like and don’t like about the way their blogs look and navigate. Then, scroll to the very bottom of the site to see who makes it.
For example, if you scroll to the bottom of my site, you’ll see that my blog is the Willow Theme by Restored 316. You can then search for Restored 316 and purchase a theme from them. (Note: there are many free WordPress themes out there as well. However, I do believe it is worth spending the money to get the perfect theme for you. This is a one-time fee as well!)
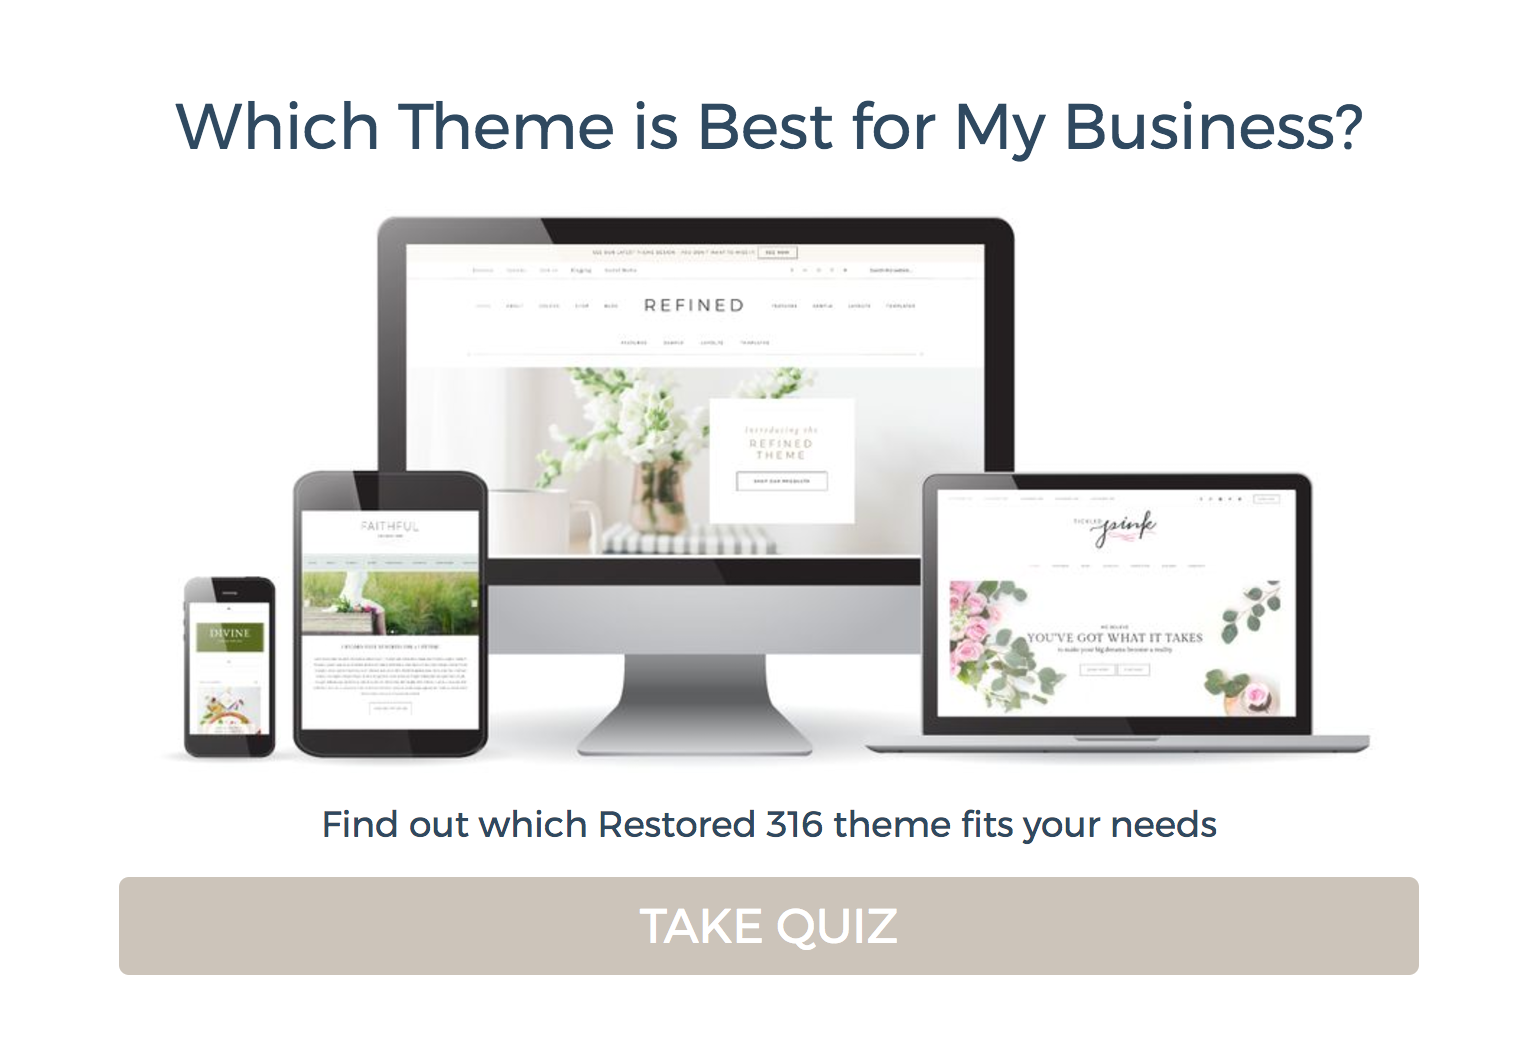
It’s important to keep in mind that there are some incredibly beautiful and visually appealing blog themes out there. HOWEVER, a lot of these themes are VERY slow – which is VERY bad.
To check to see if the theme you like is fast, view the “demo” version of it, then copy the demo URL and go to Google PageSpeed Insights. Paste the demo URL into PageSpeed Insights and click “Analyze.” Google will then give you a report about how fast the site is. Ideally, you want your site to load in less than 4 seconds or you will lose over half the clicks you get to your website!
I, personally, recommend Restored 316, as their customer service is fantastic, and they make fast, easy-to-navigate, feminine WordPress themes.
Whichever theme you decide, it will come with a set of instructions for how to install it. Save those for after you complete this next step…
4.) Buy Your Domain Name + Setup Hosting
Once you have a niche, name, and look in mind, it’s time to buy your domain name and hosting.
- A domain is your URL. Mine is have-clothes-will-travel.com, and I also own haveclotheswilltravel.com (which is a terrible domain – FYI. It’s way too long and complicated. HCWT.com would have been way better, but, unfortunately, it was already taken.) You have to pay a small fee each year to keep this URL.
- Web hosting is where your website lives on the internet. You’re essentially renting space on the internet when you purchase hosting. There are tons of companies that offer hosting services for a monthly fee. Picking the right one can make your life a lot easier in the long run! (It’s easiest, typically, to buy your domain name and hosting together. And yes, you need both!)
My thoughts on hosting providers…
For beginners: SiteGround is who I had been using as my blog’s hosting provider for several years. I recommend them if you are just starting your blogging journey. (If you’re getting more than 100,000 page views a month, though, Siteground is not the best option, see next box.)
For established blogs: I currently use BigScoots as my host, and I LOVE them. They have great customer service, fast hosting, and can handle some serious traffic. But if you’re not yet getting hundreds of thousands of page views a month, they are pretty pricey, and I would not say it’s worth spending that much on a hosting plan until you’re getting more than 100,000 page views a month.
BAD HOSTING PROVIDERS – AVOID AT ALL COSTS
When I first started, I had been using GoDaddy, and GoDaddy is an absolute nightmare. If you are using GoDaddy…cancel AS SOON AS POSSIBLE. GoDaddy is very expensive, they slowed down my website and crashed it on nearly a monthly basis, and their customer service is incredibly rude and demeaning. DO NOT USE GODADDY.
I also think it’s worth noting too, that A LOT of bloggers recommend using BlueHost on their blogs. However, I’ve heard a lot of stories about BlueHost that are very similar to my past experiences with GoDaddy. Unfortunately, many bloggers recommend BlueHost because they pay bloggers handsomely for referrals. Just a few months ago I had a BlueHost rep reach out to me and offered me $125 per referral, even though I had never personally used BlueHost!
I do get a referral bonus if you signup to SiteGround using my referral link, but it’s $50. (I also get a commission with BigScoots. I’m not sure how much it even is, though.) Both SiteGround and BigScoots also required me to actually have an account with them before I could promote their services… (makes sense right?) And I can say in all honesty, that SiteGround is incredible – they have helped me with so many technical issues over this last year, I would need an entire book dedicated to the help they have provided my website! I can’t recommend their services enough.
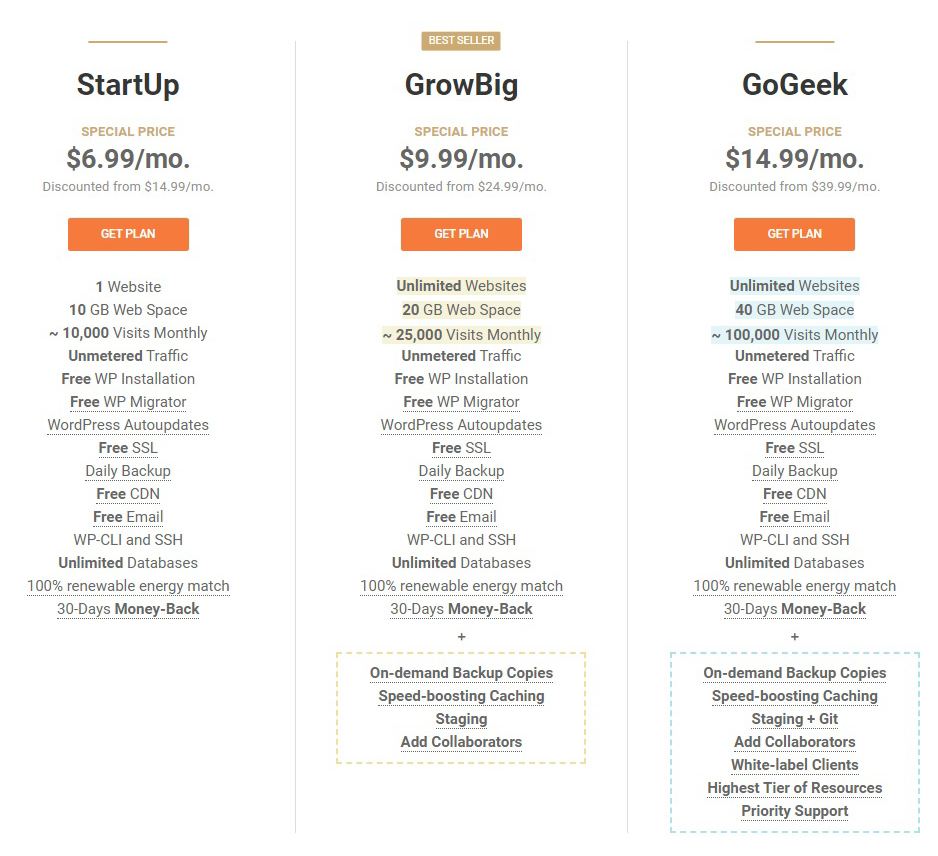
SiteGround has three plans to choose from.
- The StartUp plan is perfect for people with one website that are just starting out. (If you’re a newbie blogger – pick this option! You can always upgrade as your site grows.)
- The GrowBig plan is a great value for money offer, including the option for multiple websites and the SuperCacher that greatly improves website speed.
- The GoGeek plan is perfect for people with e-commerce and larger sites, or more geeky development needs like more server resources and GIT integration. (I had this one, personally – as I need more server resources. I did eventually outgrow this plan, though, and that is when I switched to BigScoots.)
Siteground Managed WordPress Hosting Packages:
Once you choose your plan, you’ll then be asked to choose your domain name. (Or if you already have one, you can simply transfer it to SiteGround.)
SiteGround will also ask you where you want your data center to be – pick the center that is closest to where your traffic will come from. If your traffic is mainly coming from the United States, then pick the US center (I believe it’s Indiana).
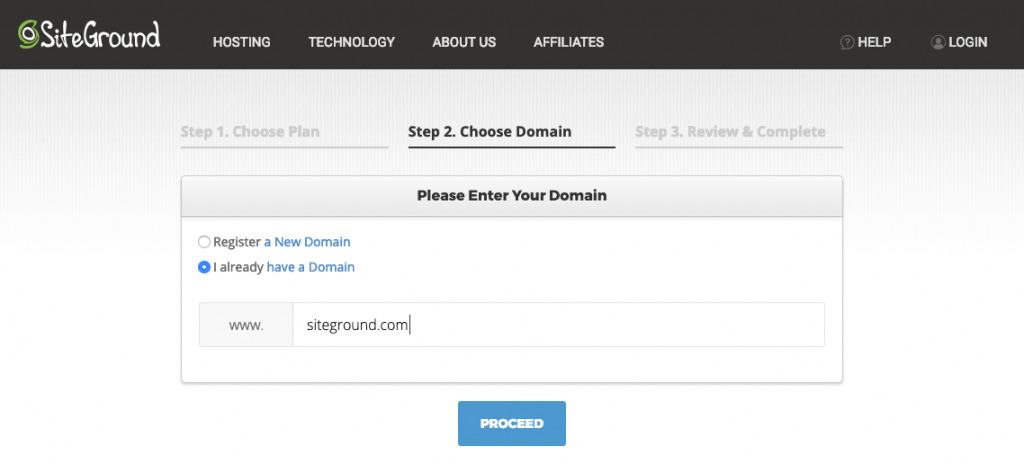
Then, you’ll review your order and click the purchase button!
5.) Get Your Blog Setup on WordPress
Next, SiteGround will prompt you to set up your blog on WordPress – be sure you go to WordPress.org to get started on your website and NOT WordPress.com.
The SiteGround Account Setup Wizard will then walk you through how to install your WordPress blog. To get started, choose the “start a new website” option and hit “Proceed.”
Note: If you get stuck or are confused at any point during this process, do not hesitate to reach out to SiteGround support – they are phenomenal and it is free to use!
Next, you’ll select the type of website you’re creating, which is “Personal blog.” And the software you are going to use is WordPress.
Then, you’ll be asked to enter your login details. I also do NOT recommend just using “Admin” or your blog’s name for a username. Hackers spend a lot of time trying to hack websites (mine was personally hacked a couple years ago), so make it difficult for them to figure out your login information!
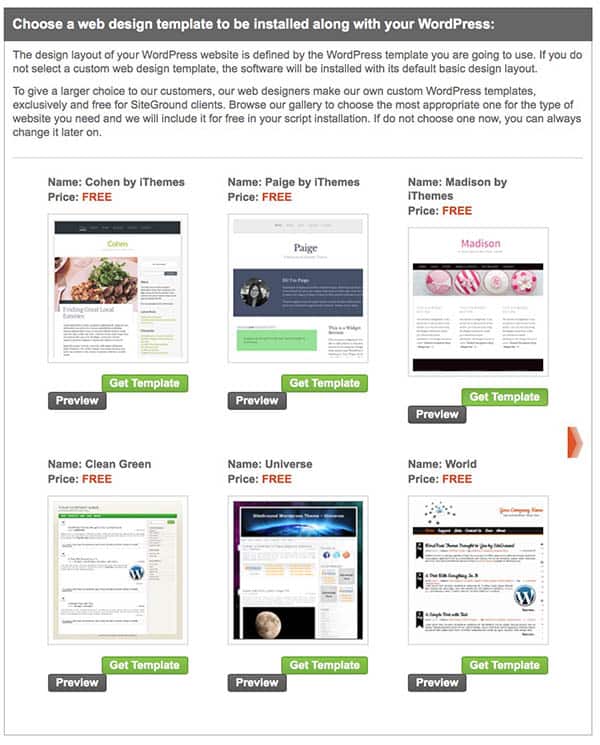
Then, you will be prompted to choose your website theme – if you are choosing a free one. If you have bought a theme you like, then skip this step and follow the installation instructions your theme sent you, they will most likely be something along these lines:
- Download the .zip file (but don’t unzip it)
- Login to WordPress
- Click appearance > themes > upload
- Upload your theme’s .zip file and then follow any instructions
If you get stuck or are confused at any point during this process, do not hesitate to reach out to SiteGround support – they are phenomenal and it is free to use!
6.) Install Plugins
Plugins are a piece of software that can be added to your WordPress website to add new features to it. It’s a way to install code without actually knowing a thing about code!
Note: less is more when it comes to plugins, you want to use as few as possible because this will greatly reduce the risk of things “breaking” on your website. Try using 10 or less.
I go over in-depth the Plugins and tools I personally use in my 20+ Helpful Blogging Tools I Use to Manage My Blog post. However, a few to get you started are:
- Yoast – this will help you understand the basics of how to get your blog to rank on Google. It’s really helpful when you’re just starting out!
- Grow – this is a plugin that gives you social share buttons on your posts. (You’ll see mine at the top and bottom of this post.)
- Google Analytics – this shows you how much traffic is coming to your website and where it’s coming from.
- Imagify – this a plugin that compresses any images you upload, so your blog will load faster.
If you bought a custom theme, your theme’s maker may have some more suggestions for plugins that will work best with your new theme as well!
I highly recommend reading through WordPress Lessons to get a deeper understanding of using WordPress. Their First Steps post is especially helpful.
7.) Customize Your Site
Now comes the fun part! This is where you get to decide which colors, fonts, and images to use on your blog. This will be done under the “Appearance” tab on the left-hand side of the screen.
It’s also a good idea to design a logo for your business. You can do this yourself via sites like Canva. Another option is to hire someone to design it for you. My current logo I had commissioned via Etsy.

8.) Write An About Me Page
I, personally, think it’s important to have an “about me” page before you launch your blog. Give your new readers an understanding of who you are and what they are going to find when they come to your blog!
This can be as long or short as you like (it’s your blog, after all). However, I recommend at least 3 paragraphs. My About Me is pretty long-winded and also links to another post that goes even more in-depth into how/why I started this blog.
Your “about me” will be a “page” of your blog. So, go to the lefthand side of WordPress and click pages>add new. Then, begin typing your “About me.”
9.) Start Writing Content
Even if it’s just one post, getting your first post out there is important. I get asked quite frequently how much content you should have on your blog before you share it with people… and, honestly, there is no right or wrong answer for this.
Some people will write just one post and others will write 10+ before they share their blogs. It’s really just your personal preference. I wrote 5 or 6 posts before I began sharing my blog, but that’s just me.
For more info on how to make a post in WordPress, check out this WordPress article.
10.) Share! Share! Share!
Share your blog everywhere! Now it’s time to share your blog with the world. Share it via Facebook, Instagram, Snapchat, Pinterest, Twitter, TikTok, and more!
Now, if this sounds absolutely horrible and you want nothing to do with the setup of your blog, you can also hire someone via platforms such as Fiverr or Codeable.
- Read next: How I Make Money as a Blogger – And Tips for How You Can Too!
- Read next: 20+ Helpful Blogging Tools I Use to Grow & Manage My Blog
*Disclosure: some of these links are affiliate links. Meaning, if you click a link and make a purchase, Have Clothes, Will Travel gets a very small commission at no extra cost to you. Thank you for supporting the brands that make this blog possible!


Excellent guide here. Decide to start writing then get on with it. Follow all of these practical tips then get going by writing your first blog post. Dive in. Get to work. Learn from pros like yourself then add personal experience to let the blogging lessons sink in.
This was so helpful. I 100% agree with picking a name that you can grow with. It was hard when I had to change. I love WordPress, I also use Siteground.
Great post! I actually have been using your host and they have been really helpful when i have had issues which really had been this week. Very thankful my friend designed my site. I figure I will keep it eh same another year or two before updated it. My name is super long lol!
This post is super helpful. Thank you!
This is a great post Lindsey. SO helpful to those thinking of starting a blog.
XOOX
Jodie